Guide
HDPE Butt Fusion Parameters & Procedure: The DVS 2207 / ISO 21307 / ASTM F2620 Guide (2026)
Heater temperature, fusion pressure (with drag), and the heat-soak / changeover / cooling times by wall thickness — the five-phase procedure, done right.
Dr. Wei Liu, P.E.
Senior Engineering Manager · Primepoly
Published: Jun 7, 2026
Updated: Jun 7, 2026
13 min read
A butt-fusion joint, done correctly, is stronger than the pipe itself — and done incorrectly, it's the single most common cause of HDPE pipeline failure. The difference is parameters: the right heater temperature, the right pressure (including drag), and the right heat-soak, changeover and cooling times for the wall thickness in front of you. This guide sets out those parameters and the five-phase procedure, drawn from the governing standards, so your joints are repeatable and verifiable.
The governing standards (and how they differ on pressure)
Four standards dominate field butt fusion, and the key difference between them is how they apply pressure. DVS 2207-1 (Europe, the most-cited) uses a single low pressure of 0.15 N/mm² for bead-up, joining and cooling, with near-zero pressure during heat soak. ASTM F2620 (USA) uses a single higher interfacial pressure (60–90 psi). ISO 21307 (international) defines three methods — single low pressure, dual low pressure (reduced pressure during cooling, for thick walls), and single high pressure (the North American approach). The cardinal rule: pick one method and use all of its parameters together — never mix them.
| Standard | Region | Pressure approach |
|---|---|---|
| DVS 2207-1 | Europe (most-cited) | Single low pressure (0.15 N/mm²) |
| ISO 21307 | International | Three methods: single-low, dual-low, single-high |
| ASTM F2620 | USA | Single high interfacial pressure (60–90 psi) |
| WIS 4-32-08 | UK water | Dual low pressure (thick wall) |
Heating element (mirror plate) temperature
DVS 2207-1 specifies a heating-plate temperature of 200–220 °C for PE, using the upper end for thin walls and the lower end for thick walls (so the surface doesn't overheat before the core is hot). ASTM F2620 specifies 400–450 °F (204–232 °C), targeting about 425 °F. Verify the face temperature with a pyrometer on the plate surface — the built-in gauge reads the internal element, which runs hotter than the working face — and check that the non-stick coating is intact and the temperature is uniform across the plate.
Calculating fusion pressure (with drag)
The standard specifies an interfacial fusion pressure (0.15 N/mm² in DVS low-pressure practice; 60–90 psi in ASTM), applied over the pipe's cross-sectional area — but the gauge on the machine reads hydraulic pressure on the piston, not interfacial pressure on the weld. So you convert: joining force = interfacial pressure × pipe annular area; gauge pressure = force ÷ total piston area; then add the drag pressure. Skipping drag is a classic error that under-pressurises the joint on long, heavy pipe strings.
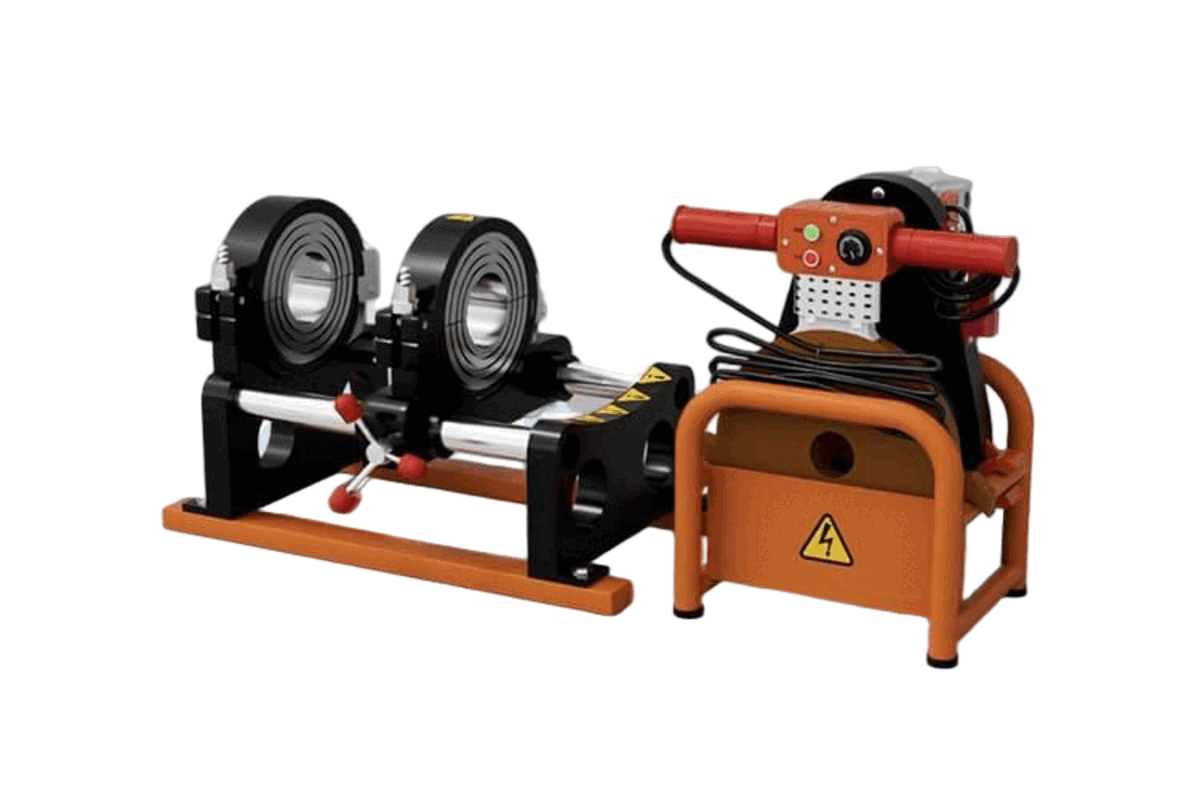
The butt fusion procedure, phase by phase
Butt fusion is five controlled phases plus preparation. Each step has a parameter (pressure, temperature or time) that must be met; the wall-thickness table further down gives the times. Follow them in order, and don't release the clamps until the joint is fully cooled.
- Prepare: clamp both pipe ends in the machine, face them to a clean virgin surface with the trimmer, check alignment (minimal high-low), wipe clean, and end-cap the pipe against airflow.
- Bead up (full pressure): press the ends against the heated plate at fusion pressure until a continuous melt bead forms around the full circumference (bead height roughly proportional to wall thickness).
- Heat soak (near-zero pressure): drop to ~drag-only pressure and let heat penetrate to depth for the soak time set by wall thickness — about 10 seconds per mm of wall. This is the long phase.
- Changeover (dwell): open the carriage, remove the heater plate, and bring the ends together as fast as possible — within the seconds-level dwell limit — so the faces don't skin over.
- Join (fusion pressure): ramp pressure back up to fusion pressure over the build-up time; a uniform double-rollback bead forms as the ends fuse.
- Cool under pressure: hold fusion pressure for the full cooling time (~1.2 min per mm of wall, or 11 min per inch) — never release early and never force-cool with water or air, which embrittles the joint.
Parameters by wall thickness (DVS 2207-1, PE)
The table below gives the DVS 2207-1 single-low-pressure parameters for PE, with the heater at 200–220 °C and bead-up / joining / cooling pressure at 0.15 N/mm². These are a reference: the pipe manufacturer's qualified procedure and your project's inspection plan take precedence, and PE100 typically needs marginally longer heat and cooling than PE80. Verify against a current copy of the standard before relying on them.
| Wall (mm) | Heat soak (s) | Changeover (s) | Build-up (s) | Cooling (min) |
|---|---|---|---|---|
| 2.0–4.5 | 45 | 5 | 5 | 6 |
| 4.5–7.0 | 45–70 | 5–6 | 5–6 | 6–10 |
| 7.0–12.0 | 70–120 | 6–8 | 6–8 | 10–16 |
| 12.0–19.0 | 120–190 | 8–10 | 8–11 | 16–24 |
| 19.0–26.0 | 190–260 | 10–12 | 11–14 | 24–32 |
| 26.0–37.0 | 260–370 | 12–16 | 14–19 | 32–45 |
| 37.0–50.0 | 370–500 | 16–20 | 19–25 | 45–60 |
| 50.0–70.0 | 500–700 | 20–25 | 25–35 | 60–80 |
Ambient conditions & site factors
Shelter the joint and the heater from wind, rain, snow and dust, and keep the heater in an insulated holster between welds so the face doesn't lose heat. End-cap the pipe to stop air flowing through it — an open pipe acts like a chimney and cools the joint unevenly — and shade the work in strong sun, since solar gain makes the top of the pipe hotter than the bottom. If site conditions differ significantly from the conditions the procedure was qualified under, stop and re-qualify rather than guess.
Inspection & QC
Inspect every joint visually: a uniform double-rollback bead all the way round, with the V-groove between the beads staying above the pipe surface (a concave or one-sided melt is a reject). For traceability, use a data-logging fusion machine that records heater temperature, soak and cooling times, drag and fusion pressure against each weld. Validate the procedure with destructive bend-back and tensile tests (ISO 13953 / ASTM F2634) on sample joints per your inspection and test plan.
Pre-fusion go / no-go
5 common butt-fusion mistakes
- Forgetting drag pressure (or measuring it wrong) — under-pressurises the joint on long, heavy runs. Measure drag for every setup and add it to the calculated pressure.
- Pressing during heat soak instead of dropping to near-zero — over-extrudes the melt, leaves a concave face and a cold core, and produces a weak joint.
- A slow changeover — the faced melt skins over before the ends meet, giving a cold joint. Minimise the dwell.
- Unclamping or moving the joint before it has fully cooled under pressure, or force-cooling with water/air — the number-one field failure; the result is brittle or pulled apart.
- Mixing parameters across standards/methods, or trusting the heater's internal gauge instead of pyrometer-verifying the plate face temperature.
Glossary
- Butt fusion
- Joining two pipe ends by heating them against a mirror plate and pressing them together to form a homogeneous weld stronger than the pipe wall.
- Interfacial / fusion pressure
- The pressure applied across the weld (pipe cross-section): 0.15 N/mm² in DVS low-pressure practice, 60–90 psi in ASTM. Converted to gauge pressure plus drag.
- Drag pressure
- The gauge pressure needed just to move the carriage and pipe. Added to the calculated fusion gauge pressure; not part of interfacial pressure.
- Heat soak
- The phase where the ends sit against the plate at near-zero pressure so heat penetrates to depth — about 10 s per mm of wall.
- Changeover (dwell)
- The brief interval between removing the heater plate and bringing the ends together; must be minimised to avoid a cold joint.
- Double-rollback bead
- The twin melt beads rolled back onto the pipe at a sound joint; the V-groove between them should stay above the pipe surface.
References & standards
- [1]DVS (German Welding Society) — DVS 2207-1 — heated-tool welding of PE pipes (licensee English copy)
- [2]ISO — ISO 21307 — butt fusion jointing procedures for PE piping systems
- [3]ASTM International — ASTM F2620 — heat fusion joining of polyethylene pipe and fittings
- [4]Plastics Pipe Institute (PPI) — TR-33 — generic butt fusion joining procedure (hosted copy)
- [5]Water UK Standards Board — WIS 4-32-08 — fusion jointing of PE pressure pipelines (PE80/PE100)
- [6]PIPA (Australia) — POP003 — butt fusion jointing of PE pipes (adopts ISO 21307)
- [7]McElroy — Increasing HDPE butt fusion productivity by optimizing cooling
- [8]PE100+ Association — What is butt fusion (HDPE welding)?
Frequently asked questions
Need expert advice on your project?
Our engineering team helps utilities, contractors and EPCs specify the right pipe material and SDR for their project. Get a no-obligation technical consultation.
Talk to an engineerRead next
Explore further
Related applications, material comparisons and country buying guides selected for this topic.